
A few months ago I started to realize I needed to learn about designing and fabricating PCBs. And with the Cadsoft Eagle software package being the darling of the open source community, I decided I would start with it. I also found that studying the open source design files of my favorite SparkFun products accelerated my learning process. My post about Eagle tutorials is located here.
And now, for my first (very ambitious) project, I decided to design a breakout board for the Roving Networks RN-52 Bluetooth Audio Module. SparkFun started selling this module a few months back. At the time, they didn’t have a breakout board for it, however they have since started selling a very basic breakout board. SparkFun also publishes a great Hookup Guide for the RN-52.
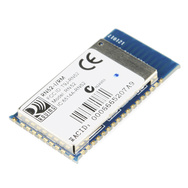
The first problem I needed to overcome, was that there is no Eagle library part for the RN-52. So I made one for it (note: SparkFun now incorporates an RN-52 Module in their Eagle parts library).

There are a few things you need to be careful with when making a new part. One, you must get the pad layout 100% accurate, because your resultant PCB will be nothing but scrap if you get the dimensions wrong. The datasheet is a great resource for proper part dimensions. Eagle will reference all locations from an “x-y center”, which you define. This location can be placed in the center of the part, bottom edge, or even outside the part. This can create some “spatial disorientation” at times! It usually requires doing a little math to convert the datasheet dimensions in order to generate a correct layout. For larger parts, I suggest laying it all out on a scrap of paper first. The UNDO command comes in handy when you enter an incorrect pad dimension!
Additionally, you must link the pads to the correct functions/pins. For example if you mislabel a pad, your traces will link to the wrong pins-another disasterous mistake. Take the time to check and re-check any parts you make.
And unlike the basic BoB from SparkFun, I wanted to add more functionality for truly evaluating the RN-52 Module’s features. Luckily for me, I was able to use the Roving Networks Evaluation Board as the basis for my project, and I finally decided upon the following design:
The schematic:

The board:

I utilized OSH Park as the PCB fabricator. OSH Park makes an Eagle Design Rules (DRU) file available for checking your board prior to submission. The Eagle Design Rules Check is a necessity, and I highly encourage you to use a PCB Fab Shop that makes their DRU file available-at least until you become an accomplished PCB maker! Here are my results:

In the end, this was more time consuming (tedious?) than difficult. I highly urge to try it yourself. My design files are available for the asking.

I’d like a copy of your design files please!
I would really like a copy of your design files if you’re still up for it! I don’t know how many times I’ve wanted to build A2DP into different projects. Many thanks either way.. great post!
Hi, just started using Eagle but can’t find the RN-52 board in Sparkfun’s library. Could you send me your files please?
Check the link on this sparkfun page:
https://www.sparkfun.com/products/11777
http://dlnmh9ip6v2uc.cloudfront.net/datasheets/Wireless/Bluetooth/RN-52%20Breakout.zip